​Easy Panels

This tutorial will show you how to add Easy Panels to your web page. Easy Panels are collapsible panels that are fairly easy to edit for someone inexperienced with html and SharePoint. We also have web parts that simply called "collapsible panels" that have somewhat similar functionality but require a little more HTML know-how to implement.

Below is a functional example of the Easy Panels. On page load all panels are collapsed. Click a panel to reveal its contents.

​​

Panel One

Sample Panel Content

If there is a "Easy Panels Javascript" Web Part in the same zone (example: "Top," "Left Column," etc.), this content will automatically be collapsed into a panel. Once the page is saved, panels will appear top-to-bottom in the same order that they appear edit-mode.

In order to change the name of the panel title:


  1. Click the arrow at the top-right of this web part, then click "Edit Web Part."
  2. In the web part properties panel that appears on the right, click the "Appearance" section to expand it.
  3. Type your tab title into the "Title" field. This will be the very first text field in the "Appearance" section.
  4. Click "OK" at the bottom of the web part properties panel.
  5. Finish any other editing, then Save & Close the page.

Note: You can make other web parts into tabs by setting the "Chrome Type" property to "Title Only".

Panel Two

Sample Panel Content

If there is a "Easy Panels Javascript" Web Part in the same zone (example: "Top," "Left Column," etc.), this content will automatically be collapsed into a panel. Once the page is saved, panels will appear top-to-bottom in the same order that they appear edit-mode.

In order to change the name of the panel title:


  1. Click the arrow at the top-right of this web part, then click "Edit Web Part."
  2. In the web part properties panel that appears on the right, click the "Appearance" section to expand it.
  3. Type your tab title into the "Title" field. This will be the very first text field in the "Appearance" section.
  4. Click "OK" at the bottom of the web part properties panel.
  5. Finish any other editing, then Save & Close the page.

Note: You can make other web parts into tabs by setting the "Chrome Type" property to "Title Only".

Panel Three

Sample Panel Content

If there is a "Easy Panels Javascript" Web Part in the same zone (example: "Top," "Left Column," etc.), this content will automatically be collapsed into a panel. Once the page is saved, panels will appear top-to-bottom in the same order that they appear edit-mode.

In order to change the name of the panel title:


  1. Click the arrow at the top-right of this web part, then click "Edit Web Part."
  2. In the web part properties panel that appears on the right, click the "Appearance" section to expand it.
  3. Type your tab title into the "Title" field. This will be the very first text field in the "Appearance" section.
  4. Click "OK" at the bottom of the web part properties panel.
  5. Finish any other editing, then Save & Close the page.

Note: You can make other web parts into tabs by setting the "Chrome Type" property to "Title Only".

​​ ​

Add the web parts

Determine on your page which web part zone you want to add the collapsible panels to. All of the panels must be in the same web part zone. If none of the available page layouts will work for your page because there aren't enough zones please contact Dawn Anthes danthes@uwsp.edu for assistance.

Once you have determined where you're going to put your Easy Panels click on the Add a Web Part link in that zone. From the web part menu go the the UWSP web parts category and select the Easy Panels Javascript web part and click Add to add it to your zone.

Easy Panels web part script

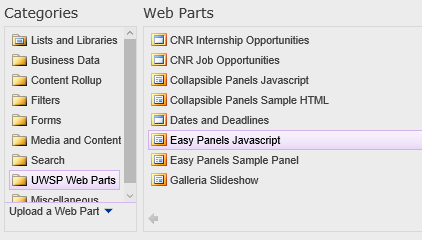
The Easy Panels javascript web part should always be the last web part in the zone that contains your Easy Panels, that's why we're adding it first.

Now add to the zone an Easy Panels Sample Panel. The Sample Panels web part is under UWSP web parts and is listed right next to the Easy Panels Javascript web part.

Easy Panels sample panel web part

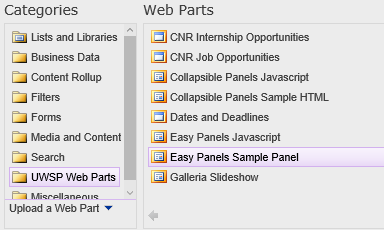
Add an Easy Panels Sample Web Panel for each collapsible panel you want on your page. Each panel is a separate web part. In the functional example at the top of the page I have three collapsible panels so I added three of the sample panel web parts.

Update the clickable text

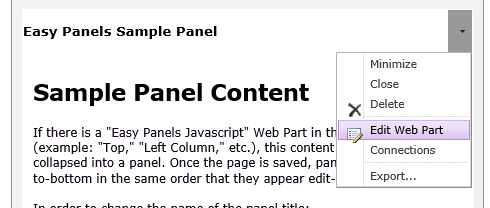
The text that you click on in each panel to expand the panel is actually the web part title. To edit the web part title bring up the edit web part menu. Move your mouse pointer over the web part's title bar, click on the little triangle that appears on the right side of the title bar to bring up a little menu, and select Edit web part from that menu.

edit web part

The page will reload and the web part options are in a menu in the upper right side of the page body. The title is in the Appearance section, click on Appearance to expand the section and see the editable options.

renaming the sample panel

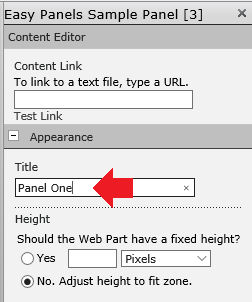
Change your web part title to whatever you'd like the text to be that you click to expand the panel. Click OK at the bottom of the web part options menu to apply your changes.

Update the panel content

Click inside of one of the sample panel web parts to edit its text. Delete the existing text and add your own content. The sample panel content area acts just like a content editor web part, you'll see that you have the standard ribbon menu for creating and formatting​​​​​​​​ your text.​​