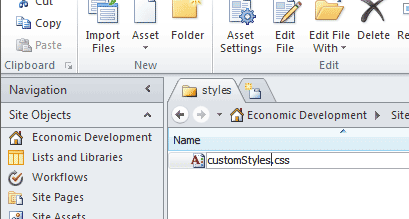
Site CSS: customStyles.css
Each site has a file called customStyles.css where you can put your custom CSS specific to that site. CustomStyles.css is located in a folder called css in the Site Assets library. If the file doesn't exist you can create it. Custom CSS put in this file will be automatically included in every page on your site.
Overriding default styles
The customStyles.css file loads after the default stylesheets for the website, so you can override default styles with the customStyles.css. For example this is how some of the different academic departments have custom colors for headings and rollover and arrow colors in the site navigation. Styles put in here would also override styles for templated things like the faculty/staff page, majors pages, and department homepages.
Do keep in mind though, just because you can do a thing it doesn't mean that you should. Don't override the default styles without a good reason and keep in mind the guidelines in URC's Communication Manual.
Create the customStyles.css
There are two ways to create our customStyles.css file:
Upload blank file via web browser
Using your favorite code editor (like Notepad++ or Dreamweaver) or plain text editing program (like Notepad) createa blank file named customStyles.css.
Back in your website go to Site Actions and select view all site content. Go to the Site Assets library under Document Libraries.

Click on the styles folder.
Click on the Add Document button and upload the blank customStyles.css file you just made.
Create it with SharePoint Designer
Open up your new site in SharePoint Designer. In the left panel listing the site contents click on Site Assets. In the large main panel in the middle click on the styles folder. At this point the styles folder should be empty. Right click in the big blank white area where files would be, from the fly-out menu select New and from there select CSS.

A new, blank CSS file will be created, rename it customStyles.css.

