Image File Size
Take a look at the following two images, can you spot the difference between them?
Image One

Image Two
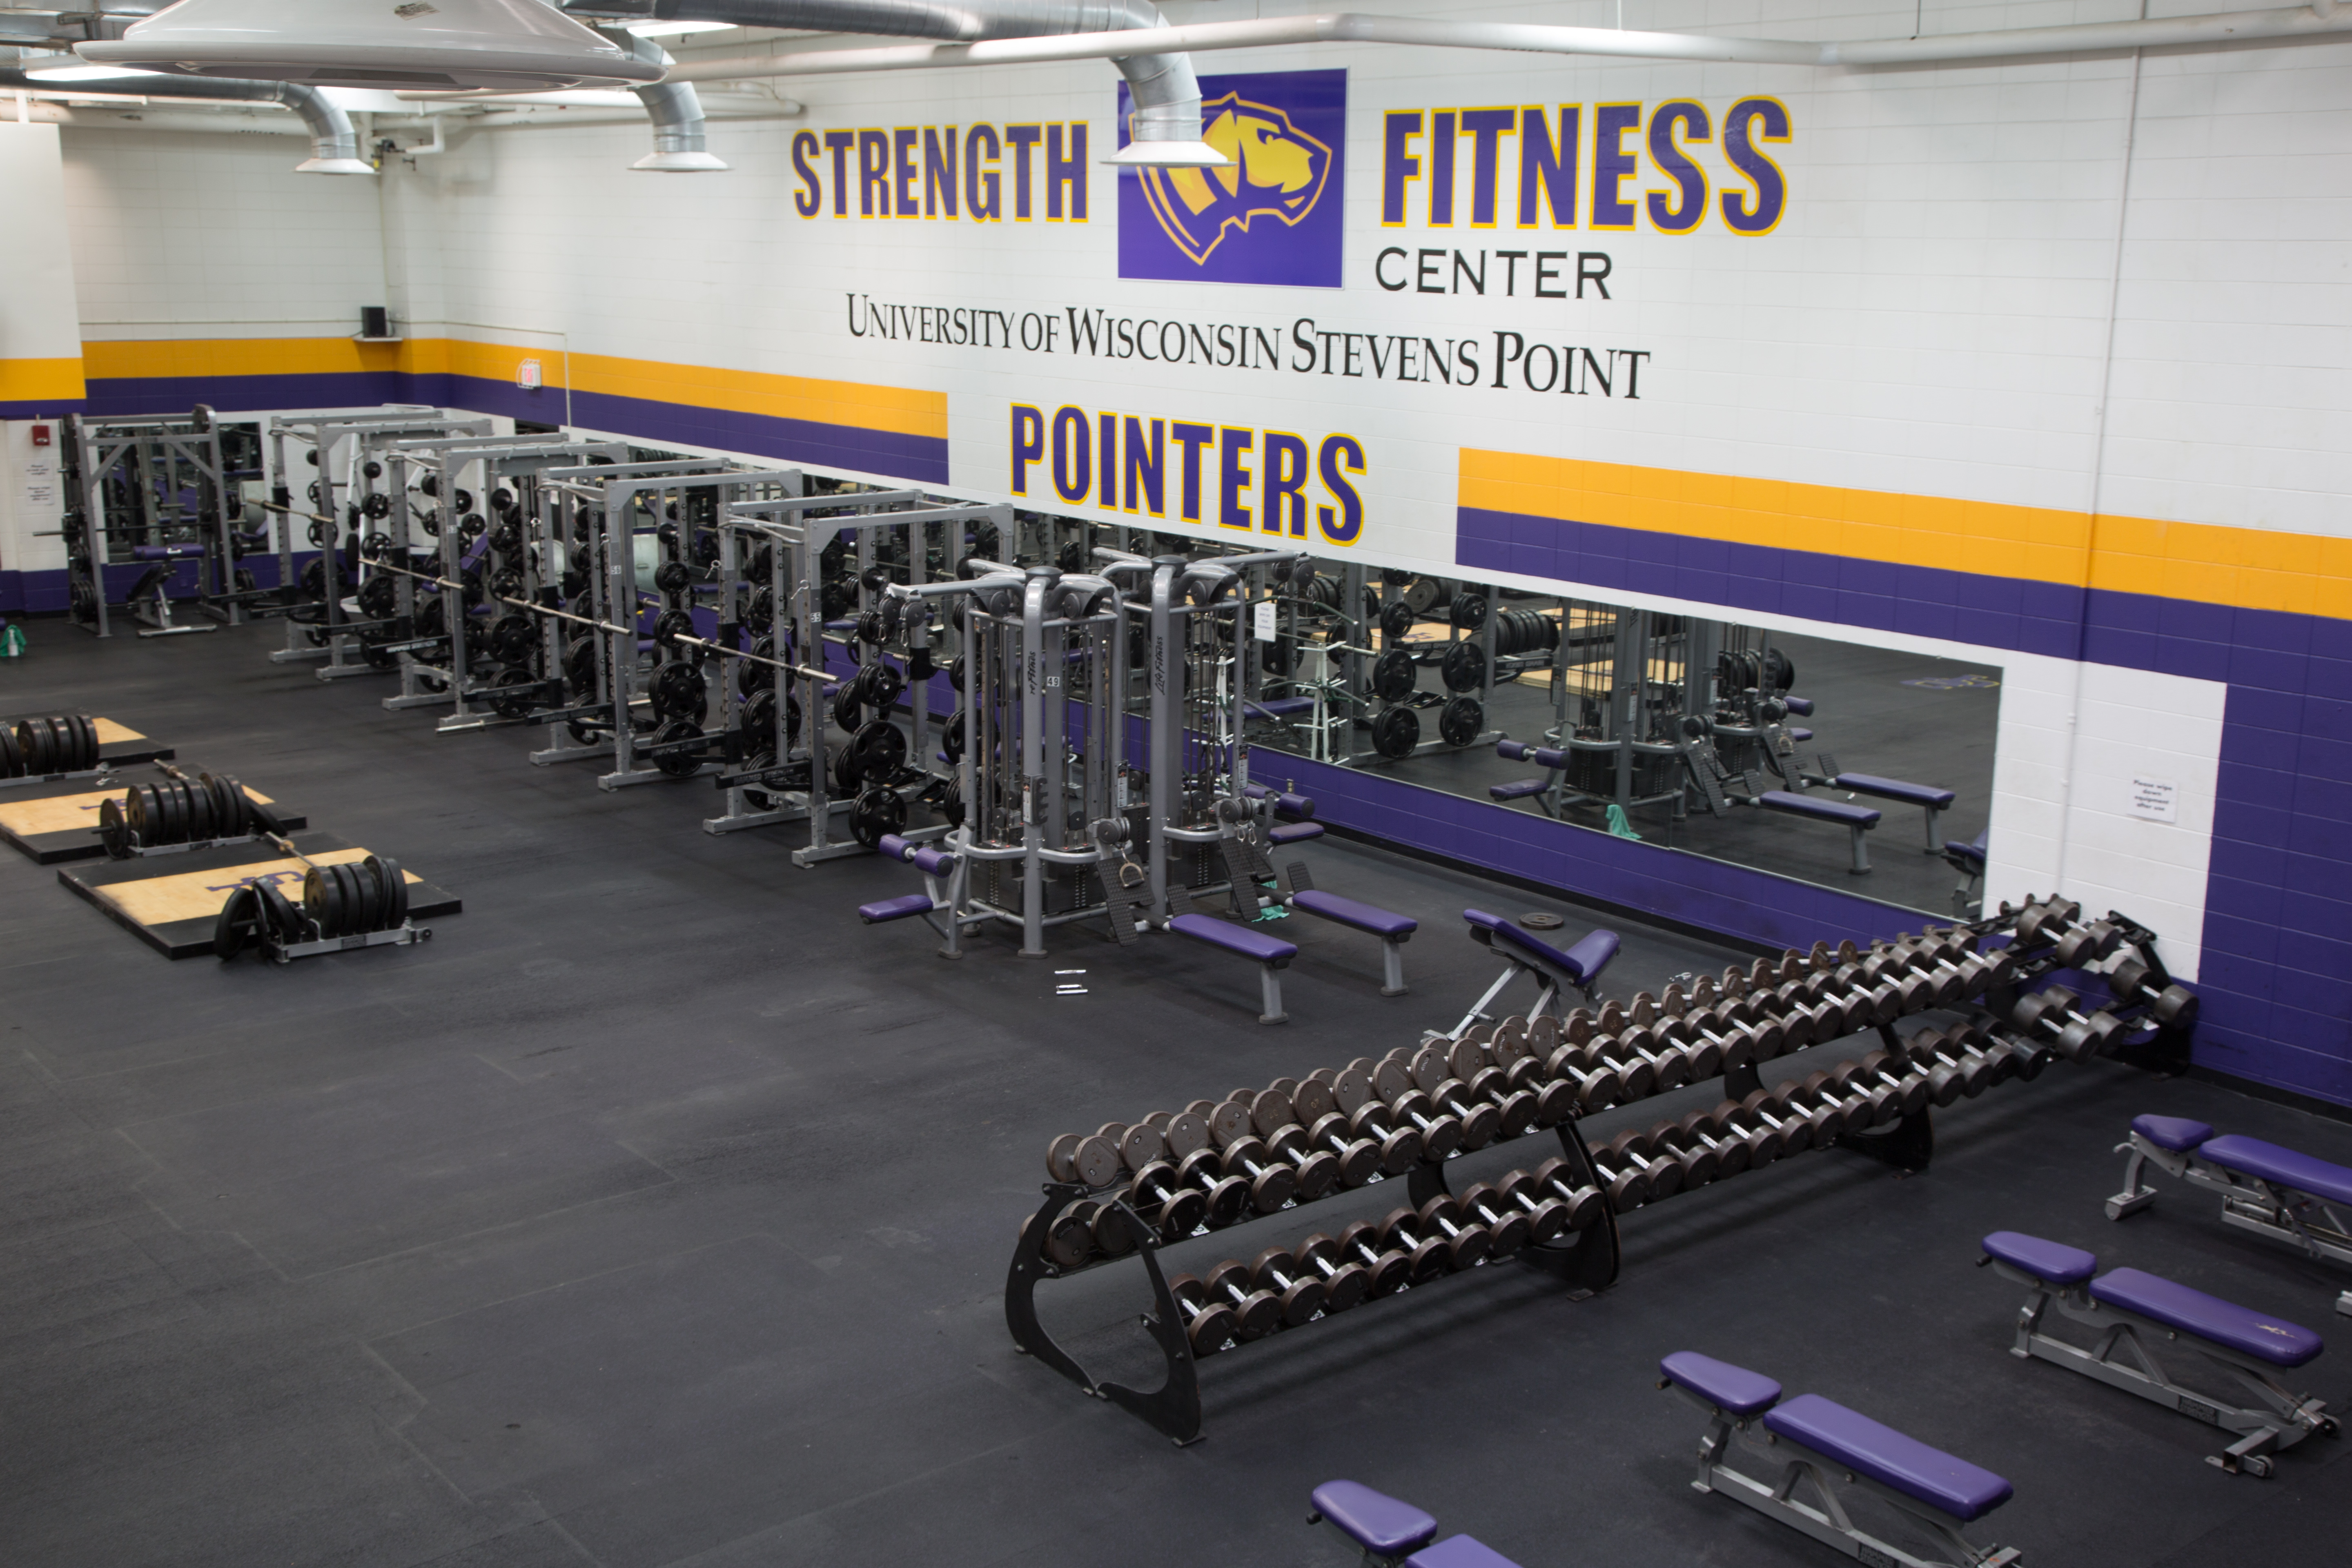
- Image one is 106k and 750px wide by 500px tall.
- Image two is 5MB and is 5760px wide by 3840px tall.
The pixel dimensions of image two is seven and a half times larger than image one. The file size of image two is 47 times larger than image one.
What?! But the images look the same!
On webpages image files can be set to display larger or smaller than their actual pixel dimensions. On www.uwsp.edu images larger than the body width will be scaled down to fit in the page if you don't specify a width for them. Image one is a little bit wider than the page body width, image two is massively bigger than the page body width.
The file size of your images matters.
Changing the pixel dimensions an image displays at in the HTML doesn't change the actual file size, it doesn't change how many kilobytes or megabytes it is. Your end user still has to download all of that data, that makes the page load more slowly. We have a fast internet connection here on campus so even very large images will load fairly quickly, but not everyone who looks at our sites will have as good of a connection. This is especially concerning for someone loading our site on their cellphone using their cell data connnection instead of wireless.
Page speed is one of the things considered by Google when they determine page ranking. Google wants their users to have a good experience, so sites that are slow are ranked a little lower than similar sites that are faster.
It's easy to come by very large images. That smart phone in your pocket probably has something like an eight megapixel camera in it. An 8 megapixel camera can turn out images that are 3264px x 2448px. DSLR and even some point and shoot models can be 20 megapixels - those put out an image of 5472 x 3648px. Any print quality images you get from URC or from a professional photographer will be very large unless they have been resized for the web.
How to resize your image.
First figure out approximately how big the area is that your image will occupy. The main content area whitespace of our webpage is 790px. Using that as a guide you can estimate the width your image needs to be. We don't need to be exact, just in the ballpark. So if you want your image to take up approximately half of the page width you could resize it to 400px wide.
Photoshop
Open the file that you want to resize in Photoshop.
Go to the Image -> Image Size menu
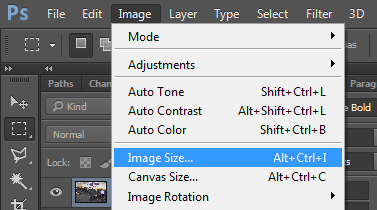
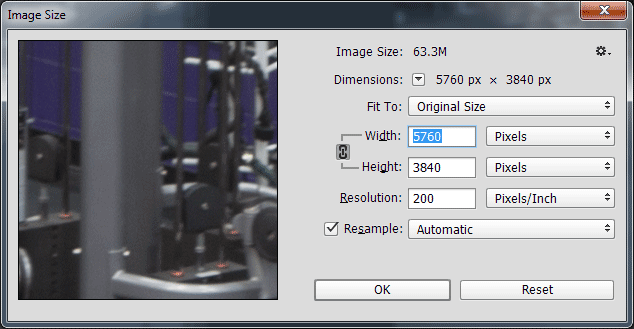
In the image resize window enter your new value for width. If it's a pixel value make sure that pixel is selected from the options. Also, make sure that the little chain icon is on between height and width. This will automatically resize the height relative to the width. If this option is turned off only the width would be be resized so you'd have a very tall, thin, distorted image. Ignore the Resolution box.
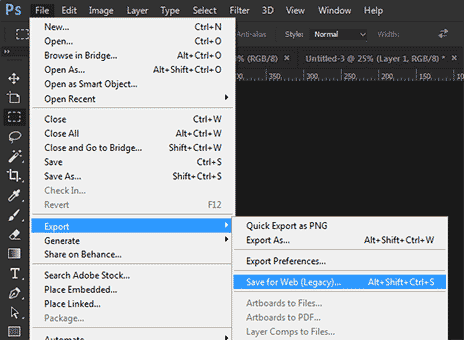
Click File -> Save for Web...
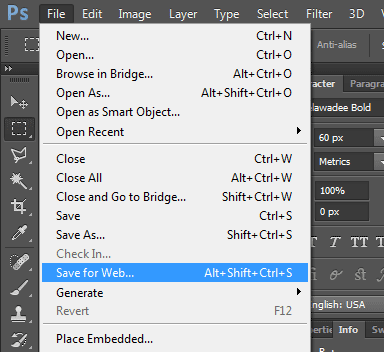
NOTE: as of Photoshop CC version 2015.1.2 the Save for Web feature has been moved. To get to it you need to go to File -> Export -> Save for Web...(Legacy).
A window will pop up where you can set several options for your saved image.

There's is a drop-down menu at the top for selecting the file type you want to save as.
- If your image is a photograph pick jpg.
- If your image is an icon, logo, or similar type of graphic pick png-8.
- If you need alpha-transparency pick png-32.
- If it's animated choose gif.
- If it's a combo of photographic and graphic elements pick jpg.
- When in doubt pick jpg.
Once you've selected a file type experiement with the quality slider (jpg) or Colors selector (png/gif) to find a good compromise between image quality and file size. Saved image size can be seen in the lower left side of the window. When you're satisfied with the settings click the Save... button.
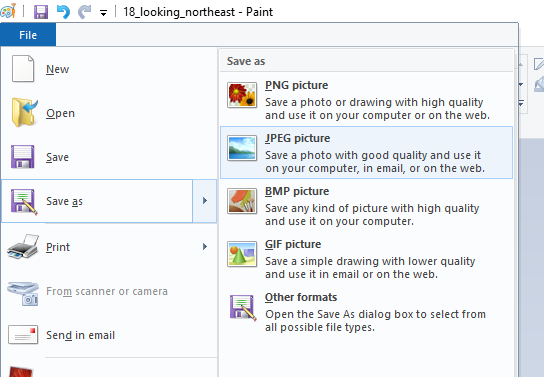
Microsoft Paint
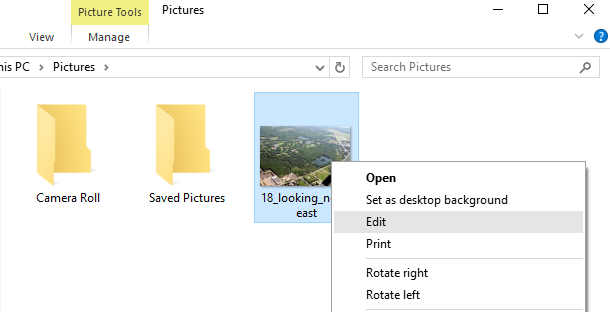
Find the file that you want to edit on your computer, right-click it and from the fly-out menu select Edit
The image will open in Microsoft Paint.

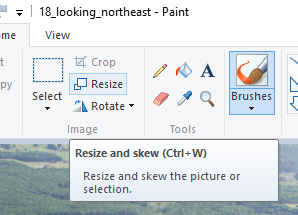
In the menu at the top click the Resize button.
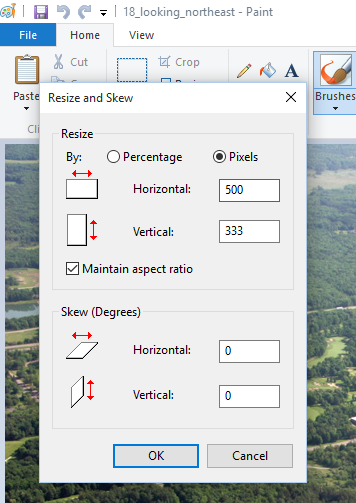
The Resize and Skew window will open. At the top for "By:" select pixels. Make sure that the Maintain aspect ratio box is checked. Enter a new width for your image, a new height will be enetered automatically based on the width that will keep the image the same ratio of height to width. Click OK to apply the change.
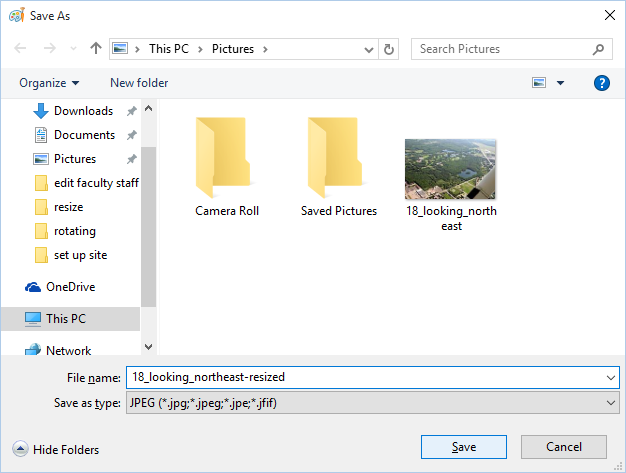
Click File -> Save As... From the menu pick a file type. If it's an image that is all text, a logo, icon or other type of graphic pick PNG. If the image is a photograph pick JPG. If it contains elements of both pick JPG. If in doubt pick JPG.
Name your file, preferably something that makes sense and describes what the image is of and click Save.
Preview
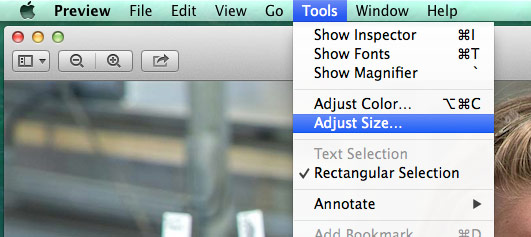
Find the image on your computer that you want to edit. Double-click on it to open it in Preview. In the menu bar at the top go to the Tools menu and select Adjust Size...
In the editing window that pops up enter the new width for your image.Make sure that scale proportionally is checked.

Your image is now resized. The change is automatically saved, you can exit Preview and upload your resized image.
 Skip to main content
