VPN stands for Virtual Private Networking. VPN allows for a secure remote connection to UWSP network resources. For example, off-campus access to restricted databases and systems should be accessed through a VPN connection.
IMPORTANT: to successfully set up your VPN connection you must also set your connection
Properties. To do this, ensure that you also complete the instructions beginning at step 10.
Set Up VPN on Windows 11
-
Click the Windows
Start button and select Settings.

-
Under
Windows
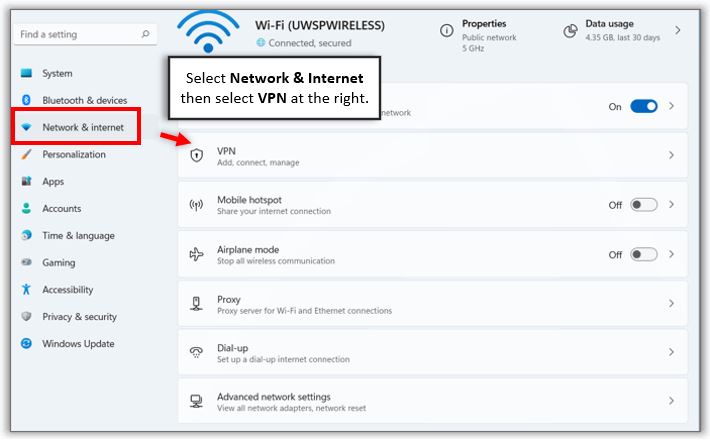
Settings, select
Network & Internet at the left.
-
At the right select
VPN.
-
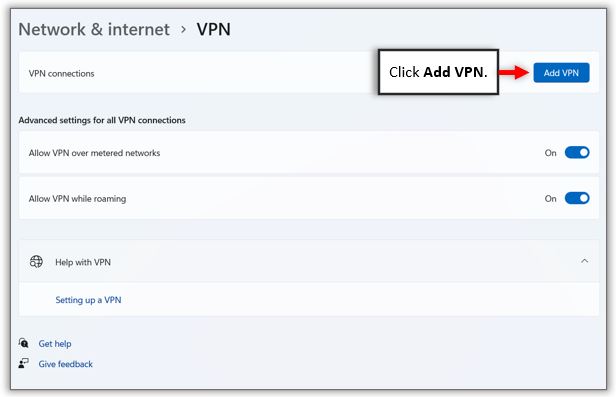
Click Add VPN.
-
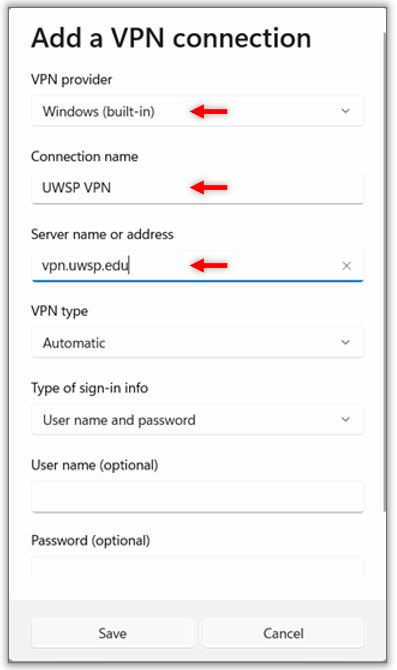
In the dialog box that opens:
-
Set
VPN provider to
"Windows (built-in)".
-
Set
Connection
name to
"UWSP VPN".
-
Set
Server name or address to "vpn.uwsp.edu".
-
Click
Save.
-
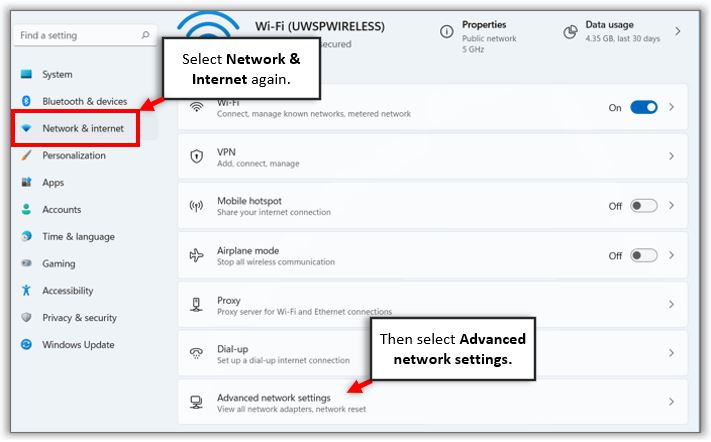
At the left, select
Network & internet again.
-
At the right select
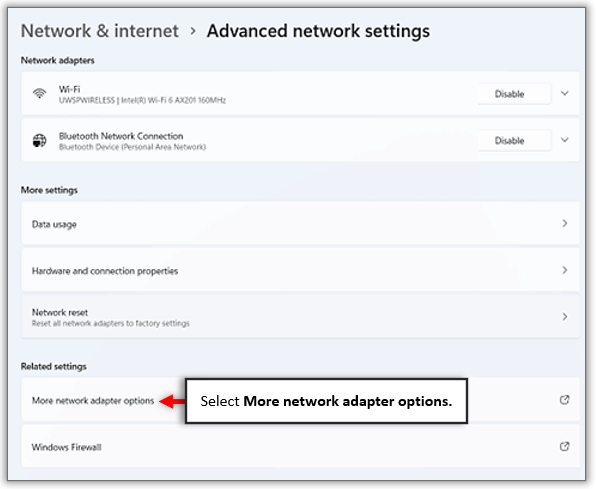
Advanced network settings.
-
In the
More Settings box, select
More network adapter options.
-
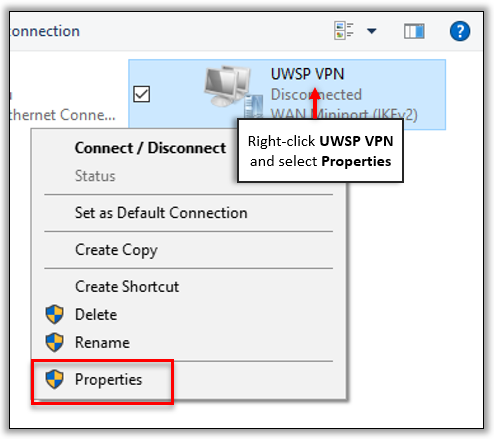
In the Network Connections box, right-click
UWSP VPN and select
Properties.
-
In the
UWSP VPN Properties box select the
Networking tab.
-
Select
Internet Protocol Version 6 and click
Properties.

-
Click
Advanced on the
Internet Protocol Version 6 Properties box that opens.
-
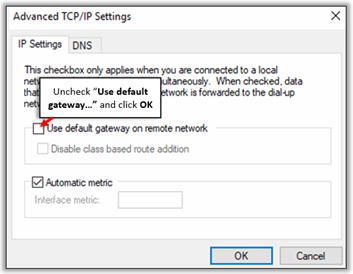
In the
Advanced TCP/IP Settings box uncheck
“Use default gateway…” on the
IP Settings tab.
-
Privately owned computers only
If you are establishing a VPN on your own personal computer
(NOT a UWSP owned computer):
-
Select the
DNS tab and in the text box labeled
DNS suffix for this connection: type,
“uwsp.edu” (no quotes).
Note:Append these DNS suffixes may display here instead.
-
Click
OK.
-
Click
OK to the
Internet Protocol Version 6 Properties box.
This returns you to the
UWSP VPN Properties box.
-
In the
UWSP VPN Properties box now select
Internet Protocol Version 4 and click
Properties.
-
Click
Advanced on the
Internet Protocol Version 4 Properties box.
-
In the
Advanced TCP/IP Settings box on the
IP Settings tab, uncheck
“Use default gateway…”.
-
Click
OK.
-
Click
OK to the
Advanced box and
OK to the
Internet Protocol Version 4 Properties box.
-
Finally, click
OK on the
UWSP VPN Properties box.
You have now disabled the default gateway for both Internet Protocol Version 6 and version 4. Your UWSP VPN should be configured.
To start a UWSP VPN connection
-
Click the Windows
Start button and select
Settings.
-
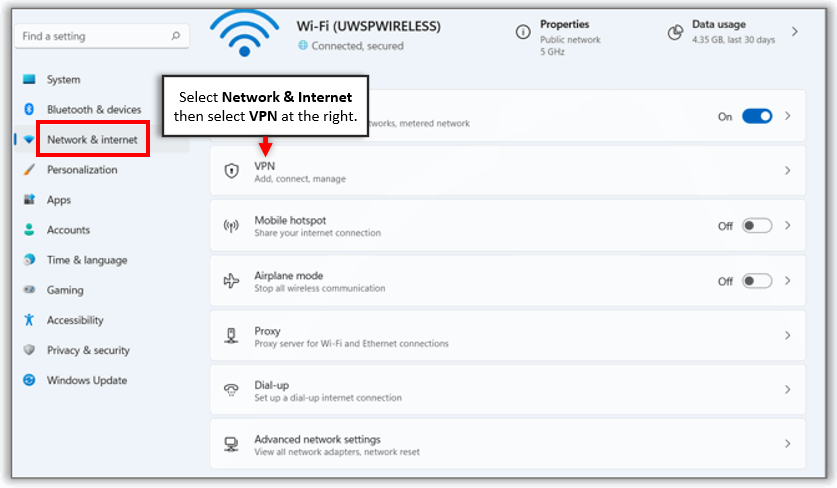
Select
Network & Internet at the left then at the right select
VPN.
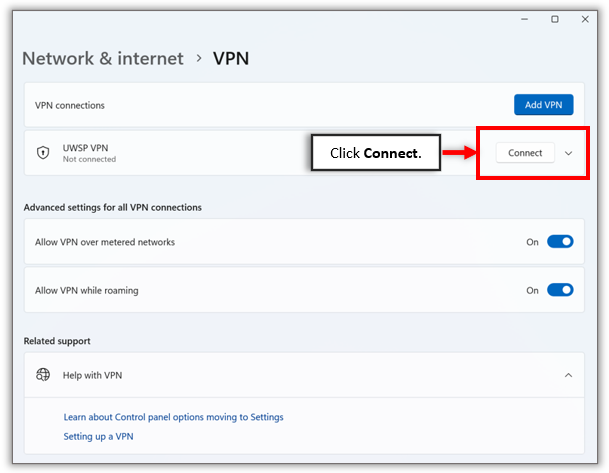
Your new VPN connection, "UWSP VPN", will display.
-
To the right of
"UWSP VPN", click
Connect.
-
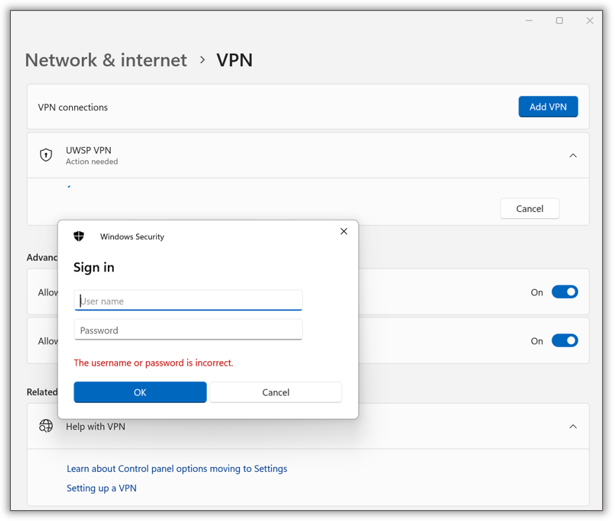
Log in with your UWSP username and password.
You will be asked to authenticate with MFA.
Have questions? Please contact the
Service Desk.
 Skip to main content
